How to Add Text and Photo Borders to a Slideshow
Version 1.6 does two things at once. It closes out every export failure our beta users reported, and it hands you two creative layers we have wanted to ship since day one: text you can style like a designer, and photo borders you can colour and animate. Everything shown below was rendered by the app itself — the borders and the lettering in each image came out of the same engine that writes your finished video.
- →Every export failure reported by beta users — memory crashes on long shows, missing audio, flashing video — has been fixed.
- →Text is now a full design layer: hundreds of fonts, gradient fills, outlines, shadows, backing plates and entrance/exit animations.
- →You can retype text directly on the preview screen, including on mobile where the editor slides up over the timeline.
- →Every photo can carry its own border with custom thickness, colour or gradient, plus eleven animated motion styles.
- →Apply to entire show pushes a border across every scene in one click.
- →Every image in this article was rendered by the app's real text and border engines, not illustrated.
1. What Changed in Version 1.6
Version 1.6 is the biggest update we've shipped since launch, and it lands in three parts. Export reliability is fixed end to end. Text is now a first-class layer you can style with hundreds of fonts, gradients, outlines and animations. And every photo can carry its own border, in any colour or gradient you like, with eleven motion styles to choose from.
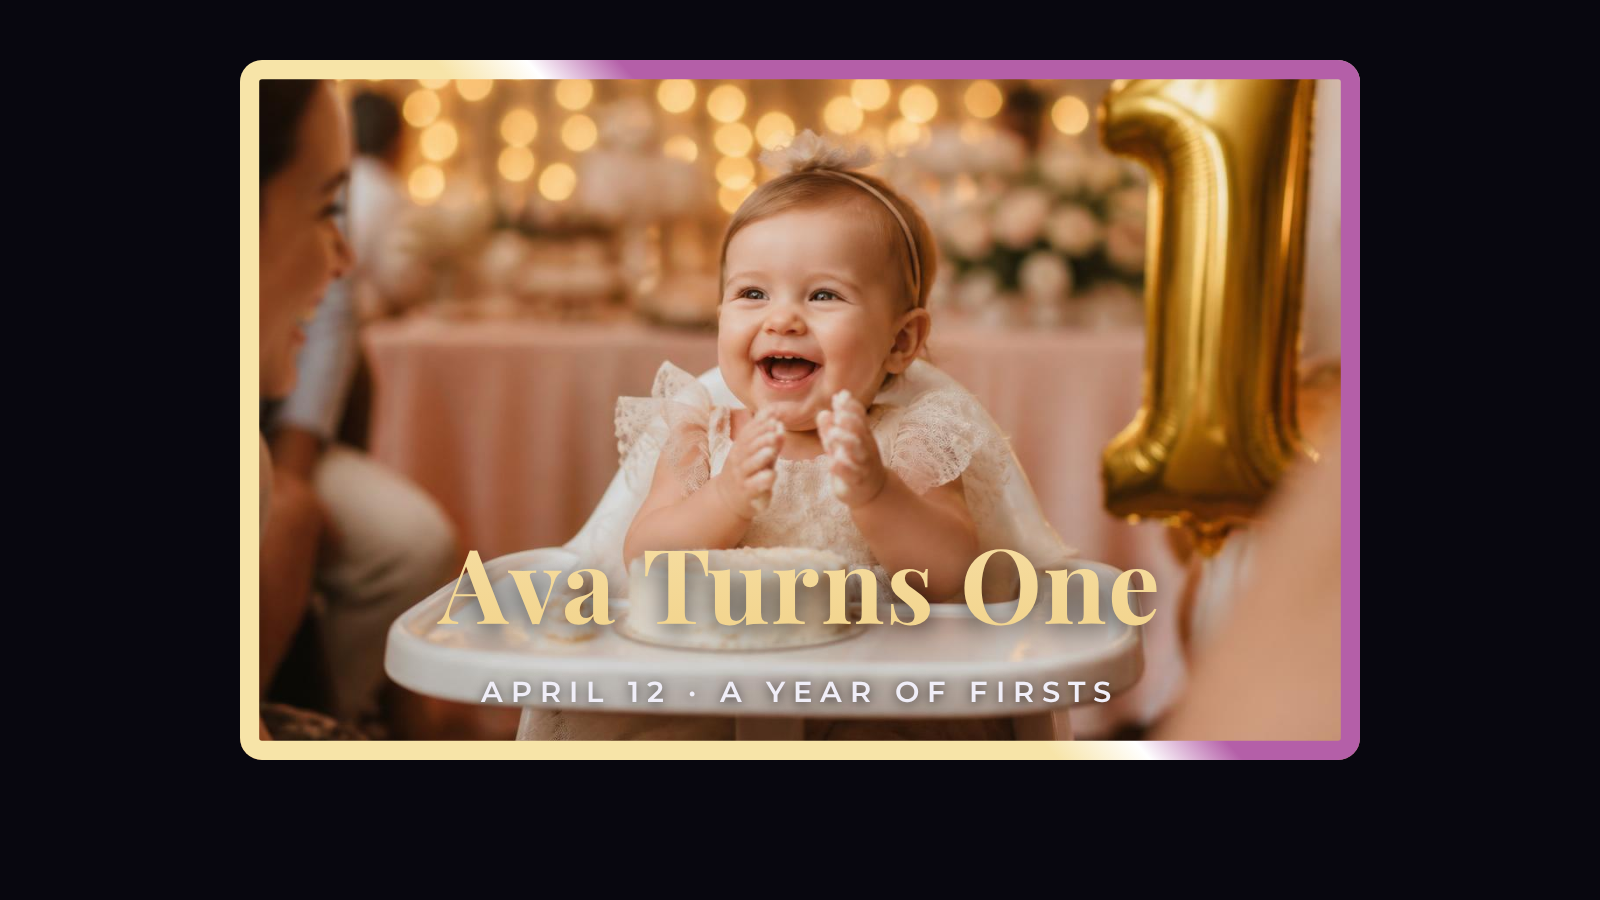
The image above is not a mockup. The sample photograph is a stand-in for your own, but the gold-to-orchid border and the lettering on top were drawn by the exact same renderer that writes your finished video. Everything you see in this post is real output.
- **Exports fixed:** long shows, big files, videos with sound — all resolved.
- **Custom text:** hundreds of fonts, editable directly on the preview screen.
- **Photo borders:** thickness, colour, gradient and motion, per photo or across the whole show.
Instead of illustrating features with artwork, we rendered these frames through the production text and border engines. What you see is what your export produces.
2. Text You Can Style Like a Designer
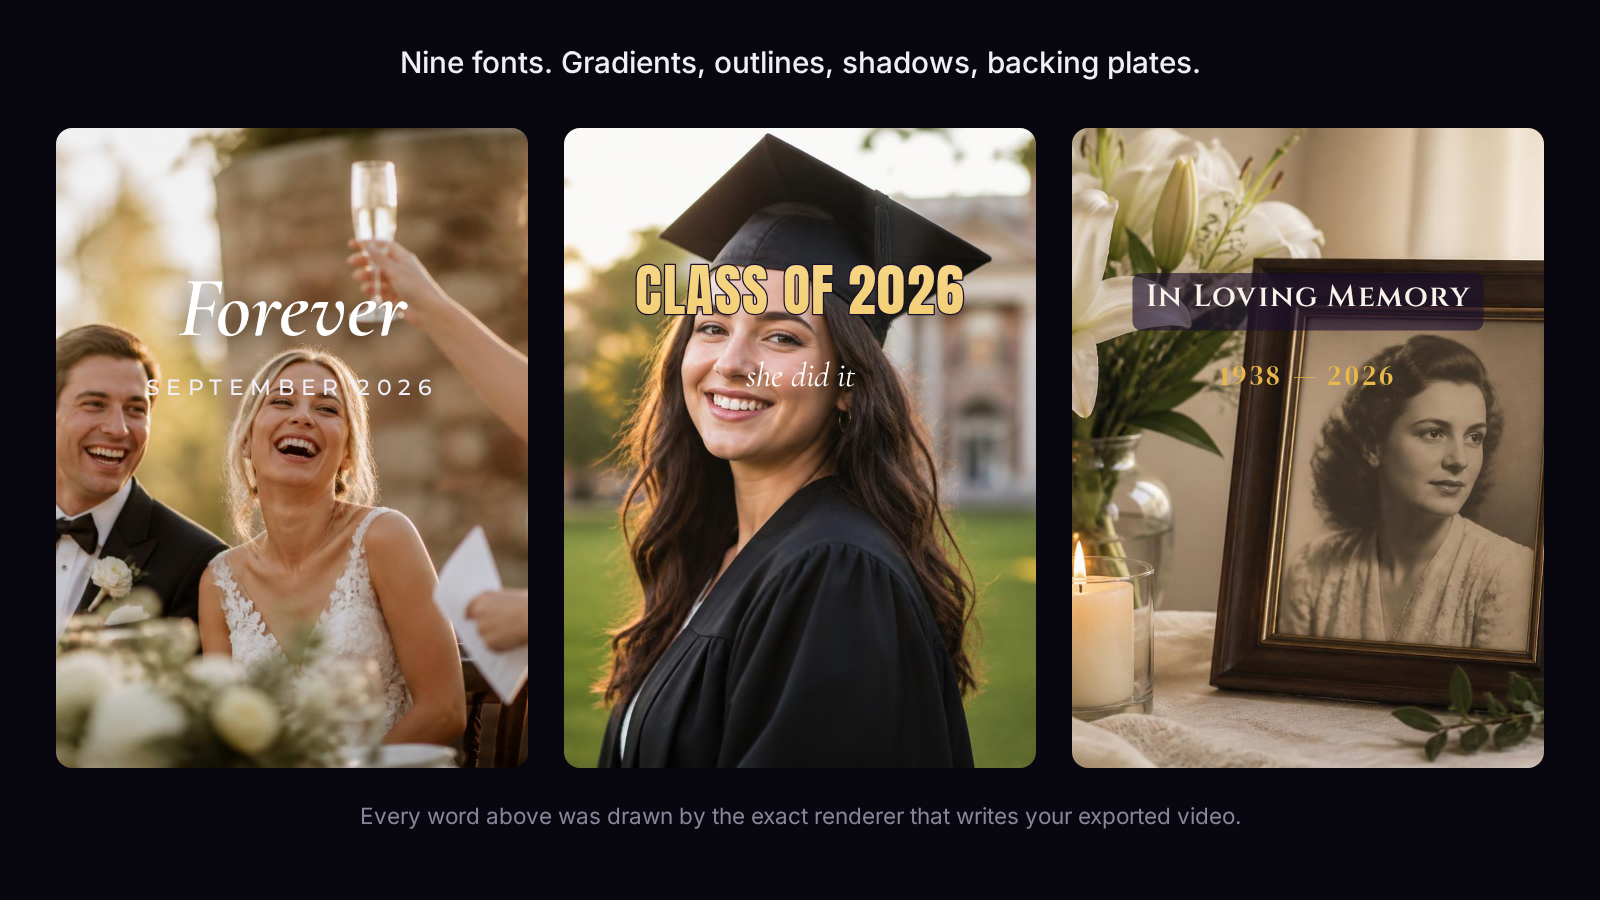
Text used to be a caption. Now it is a design element. Add a text block anywhere on the timeline, drag it wherever you want on the frame, and give it a look that matches the occasion — a wedding wants Cormorant in italic, a graduation wants Anton in gold with a hard outline, a memorial wants Cinzel on a soft backing plate.
The three frames above use six different typefaces between them. Nothing was retouched afterwards. The gradient fill, the outline, the drop shadow and the translucent plate behind the memorial line are all built-in options in the text inspector.
A curated catalogue spanning sans, serif, display, script and mono — organised so you can find the right tone fast.
Any two colours at any angle, painted through the letterforms rather than sitting behind them.
Keep type legible over busy photographs without dropping a black bar across the frame.
A rounded, adjustable panel behind the text for maximum readability on light images.
Fade, slide in any direction, zoom, pop or typewriter — with independent entrance and exit timing.
Double-click any text on the preview screen and type. On phones, one tap slides the full editor up from the bottom.
Double-clicking a text block on the preview lets you retype it in place and watch the frame update as you type. Tap once on mobile and the editor slides up over the timeline, with a checkmark to close it again.
3. Photo Borders, and Eleven Ways to Move Them
A border does something subtle but powerful: it separates the photograph from the background and makes the whole show feel intentional. In v1.6 every photo can carry one. Set the thickness, pick a solid colour or a two-stop gradient at any angle, and then decide whether it sits still or moves.
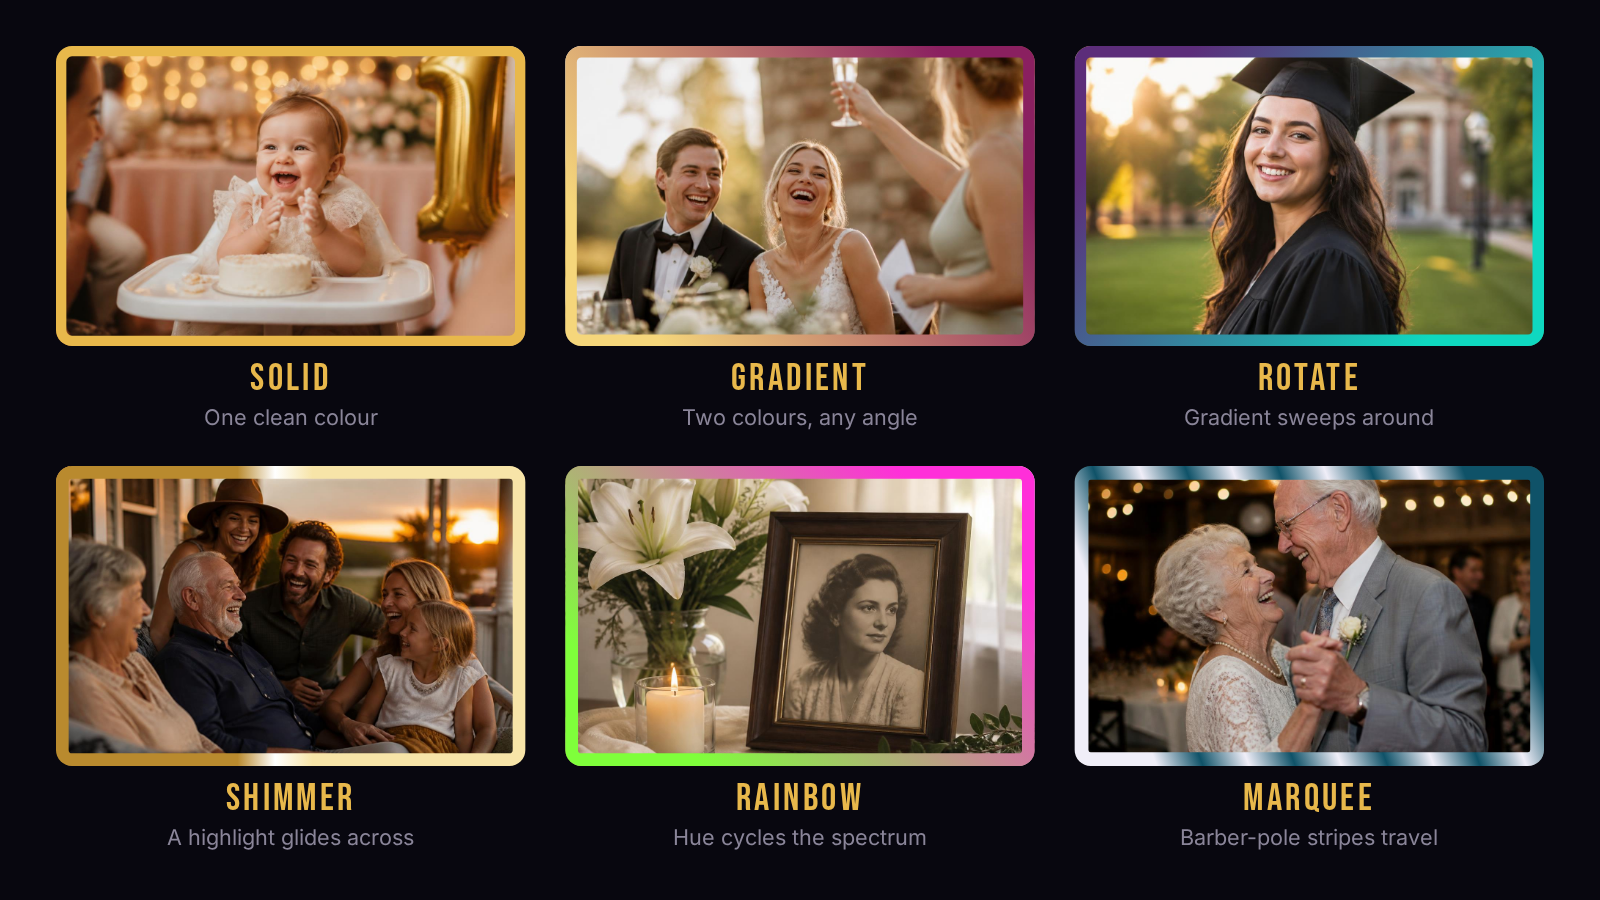
The six frames above are the same border engine at six different moments in time. Rotate spins the gradient around the frame. Shimmer glides a highlight along the edge. Rainbow cycles the spectrum. Marquee runs barber-pole stripes around the perimeter. Each one was captured mid-animation, exactly as it renders in your export.
| Motion style | What it does | Best for |
|---|---|---|
| Solid / Gradient | A still edge in one colour or two | Weddings, memorials, anything formal |
| Rotate | The gradient sweeps around the frame | Modern, energetic shows |
| Shimmer | A bright highlight glides along the edge | Anniversaries and celebrations |
| Pulse / Breathe | The border gently thickens and thins | Slow, reflective pacing |
| Rainbow / Twinkle | Colour cycles or sparkles along the edge | Birthdays and kids' shows |
| Marquee / Chase / Wave | Stripes or a light travel around the perimeter | Sports reels, highlight videos |
Set a border on one photo, then use Apply to entire show to push the same treatment across every scene in one click.
4. Both Layers, One Frame
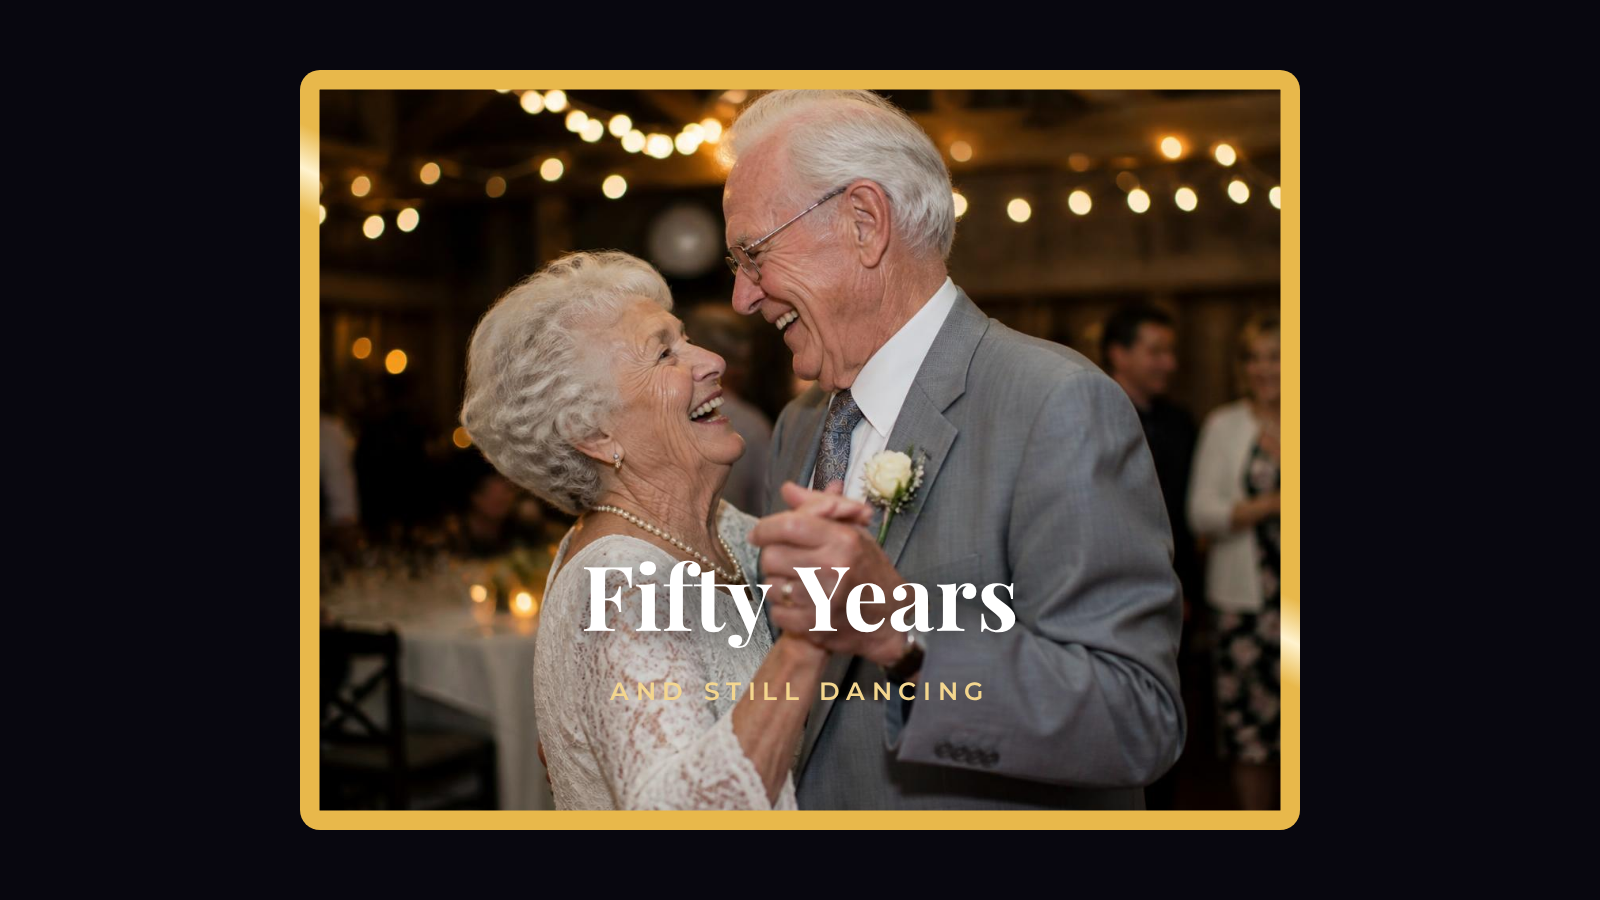
Borders and text are designed to work together. A warm gold chase border around a fiftieth-anniversary photograph, a Playfair headline with a soft shadow, and a spaced-out Montserrat subtitle in the same gold as the frame — three decisions, thirty seconds of work, and the slide reads like it came out of an editing suite.
Because both layers are resolution-independent, the same frame renders identically at 720p for a quick share and at 4K for a projector at the venue. Nothing shifts, nothing re-wraps, nothing has to be redone.
Get the weekly digest
No spam. Unsubscribe anytime.
5. Exports Are Fixed
We have to be straight with you: exports were unreliable for a stretch, and the reports we received were fair. Long shows ran out of memory. Some videos exported without sound. Clips flashed or dropped frames. Every one of those has been diagnosed and fixed.
- **Long shows finish.** Frames now stream straight to disk instead of piling up in memory, so a six-minute tribute exports as readily as a sixty-second clip.
- **Audio stays intact.** Every audio source is prepared before mixing begins, so no track can be silently dropped.
- **Video clips play smoothly.** Clips are decoded in sequence rather than scrubbed frame by frame, which removes the flashing and stuttering.
- **Photos stay sharp.** The exporter picks the highest-resolution source available for the resolution you chose.
Tell us. Every fix above started as a bug report from someone using the app for a wedding, a graduation or a funeral. Reports go straight to us and they get worked.
6. How to Use It
- Open your project and go to the Text panel in the left sidebar.
- Pick a font. Categories are grouped by tone, and Pro fonts are marked with a badge so you always know what is included in your plan.
- Drag the new text block into position on the preview, then set size, colour, gradient, outline, shadow and animation in the inspector.
- Double-click the text on the preview to retype it in place — on a phone, tap once and the editor slides up from the bottom.
- Select any photo and open Photo Border. Set the thickness, choose solid or gradient, pick your colours.
- Choose a motion style, or leave it on None for a still edge.
- Hit Apply to entire show if you want that border on every photo, then export.
Photo borders and the Pro font families are part of the Pro plan. Everything else — the text layer itself, the Common font set, positioning and animation — is available to every account.
Frequently asked questions
One short note. One great slideshow idea. Every week.
No spam. Unsubscribe anytime.
Comments (0)
Be the first to comment.
